正则表达式
这里就讨论最简单的正则表达式实现,由字符集[a-zA-Z0-9]和*,+,?,|组成。
1. NFA
正则表达式和一个不确定有限状态自动机(NFA)是等价的。可以根据一个正则表达式创建一个NFA。比如有正则表达式a(bb)+a,可以构建如下等价的NFA:
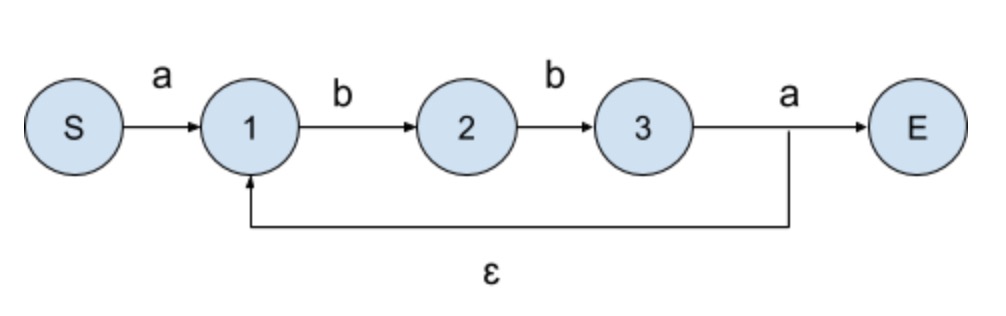
其中ɛ表示一个空字符串,即状态3可以直接跳转到状态1,或者在遇到字符a时跳转到匹配状态E。
1.1 构造NFA
要由一个正则表达式构造一个NFA,可以将正则表达式分割成由以下基本组件构成:
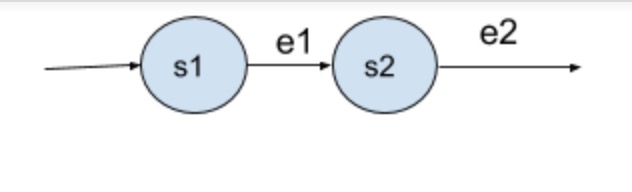
- Concate:
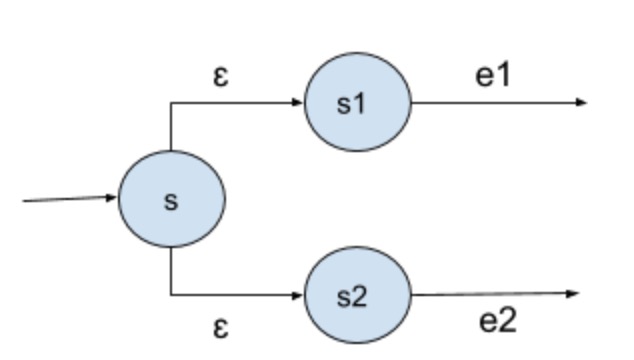
e1e2 - Split:
e1|e2 - Optional:
e? - Plus:
e+ - Star:
e*
每一个基本组件对应的NFA的分别为:
Concate,
Split,
Optional
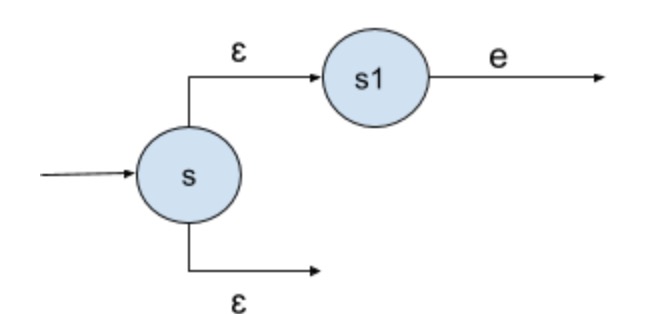
Plus,
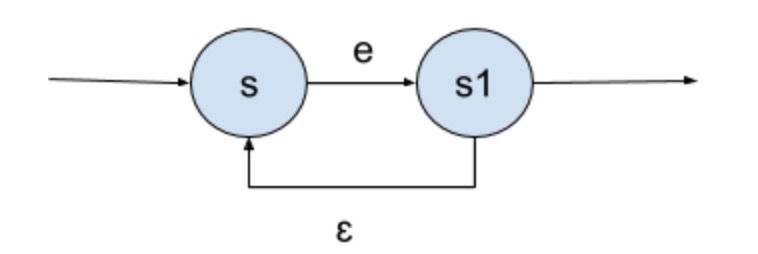
Star

正则表达式a(bb)+a可以拆分成
1 | e1 = bb e2 = e1+ e3 = ae2 e4 = e3a |
这样构造出来的NFA就是文章开头的NFA
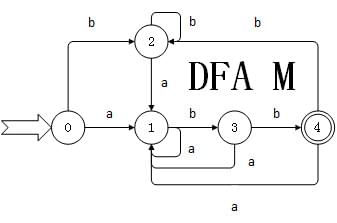
2. DFA
确定有限状态自动机(DFA)和NFA的不同之处在于DFA的每一个状态的输入和输出都只有一个,而且DFA没有ɛ边。DFA和NFA是等价的,一个NFA可以转化为一个DFA,而且所有等价的DFA最终可以转化为一个最优化的DFA。
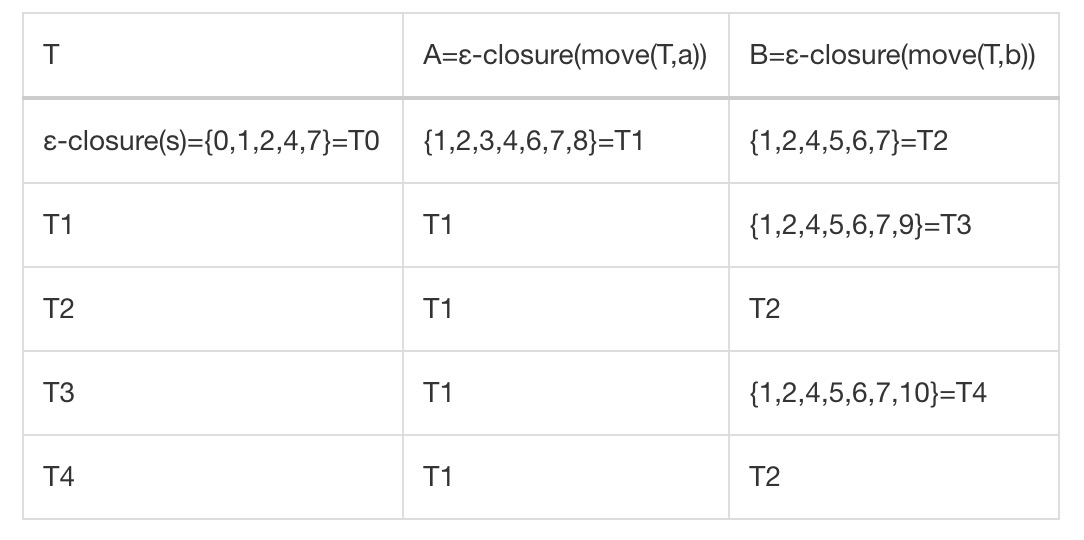
NFA转化成DFA的关键在于找到ɛ闭包,一个状态s的ɛ闭包为s经过任意条ɛ边所能达到的状态的集合。构造DFA的过程其实就是不断计算ɛ闭包的过程。比如有下面的NFA:
构造DFA的步骤如下:
- 计算状态0的ɛ闭包,ɛ-closure({0}) = {0, 1, 2, 4, 7} = T0
- 计算T0中的所有状态在输入字符集中的一个字符时得到的状态集合,move(T0, a) = {3, 8},move(T0, b) = {8}
- 分别计算结果结合的ɛ闭包,ɛ-closure({3, 8}) = {1, 2, 3, 4, 6, 7, 8} = T1, ɛ-closure({8}) = {1, 2, 4, 5, 6, 7} = T2
- 对T1和T2重复上述操作,直到没有新的集合产生。
这样之后{Ti}即新的DFA的状态集合,用表格记录计算结果,
上文的NFA构造之后的DFA结果为: